
Advanced setting of Mapping
Overview
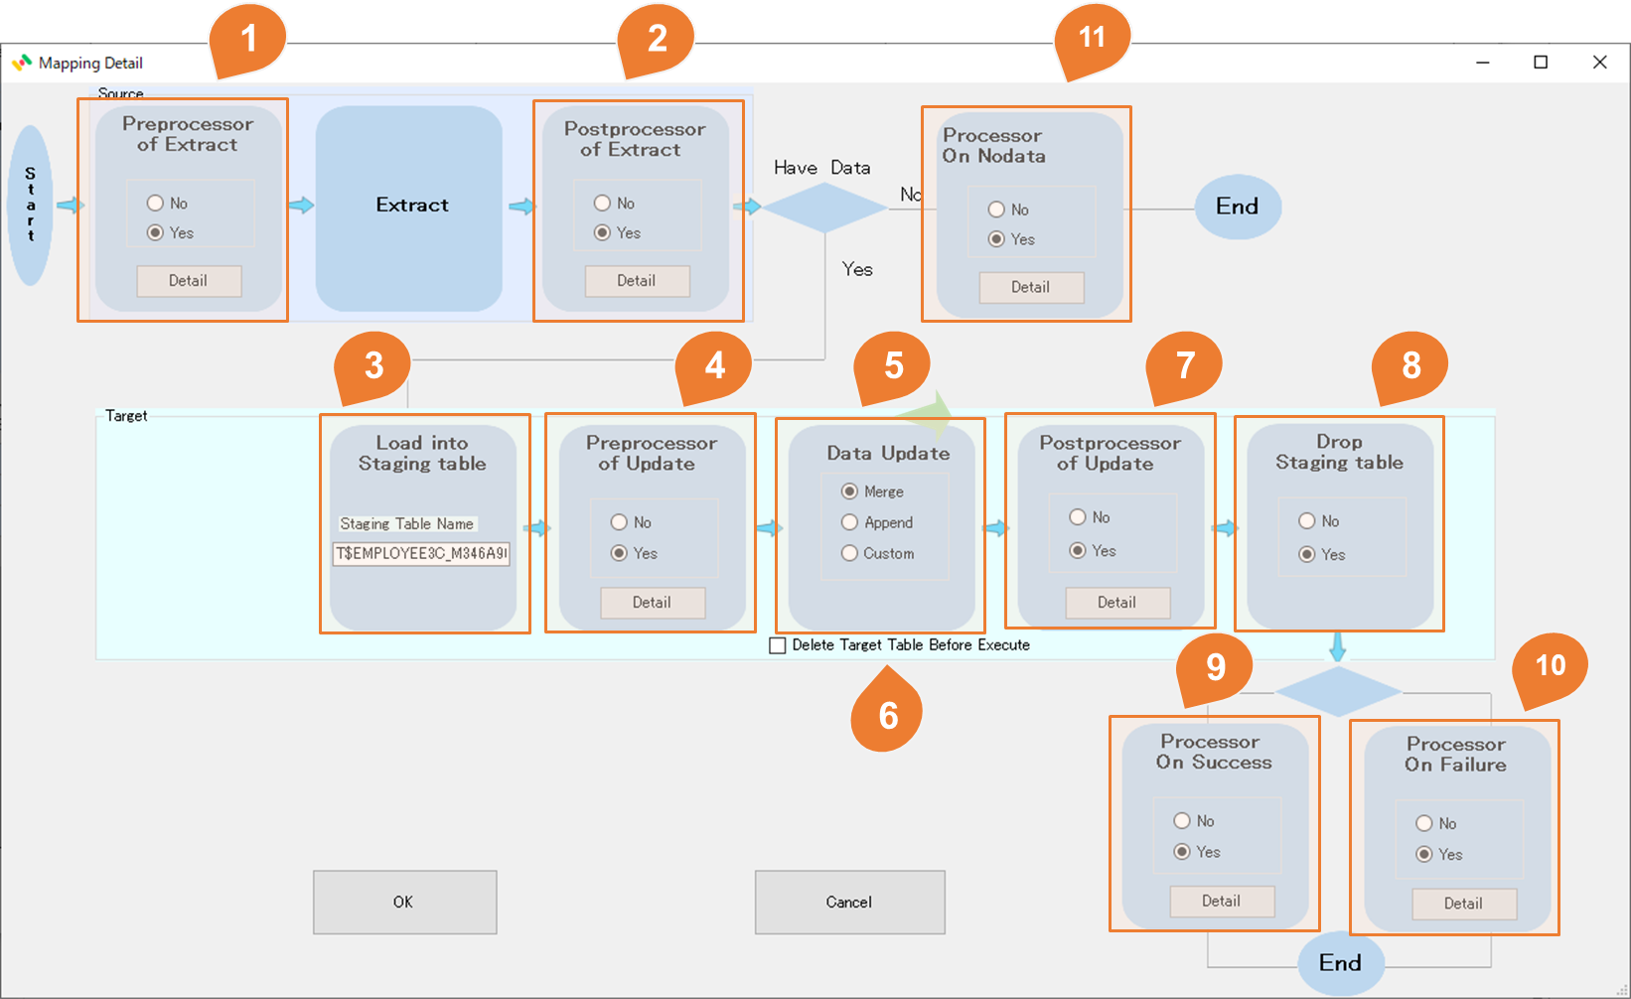
The following detailed settings can be added during the mapping process.
1. Pre-processing and Post-processing before and after Data extraction, updating.
2. Set up data processing, notification, etc. for success, failure or no target data during mapping.
configuration
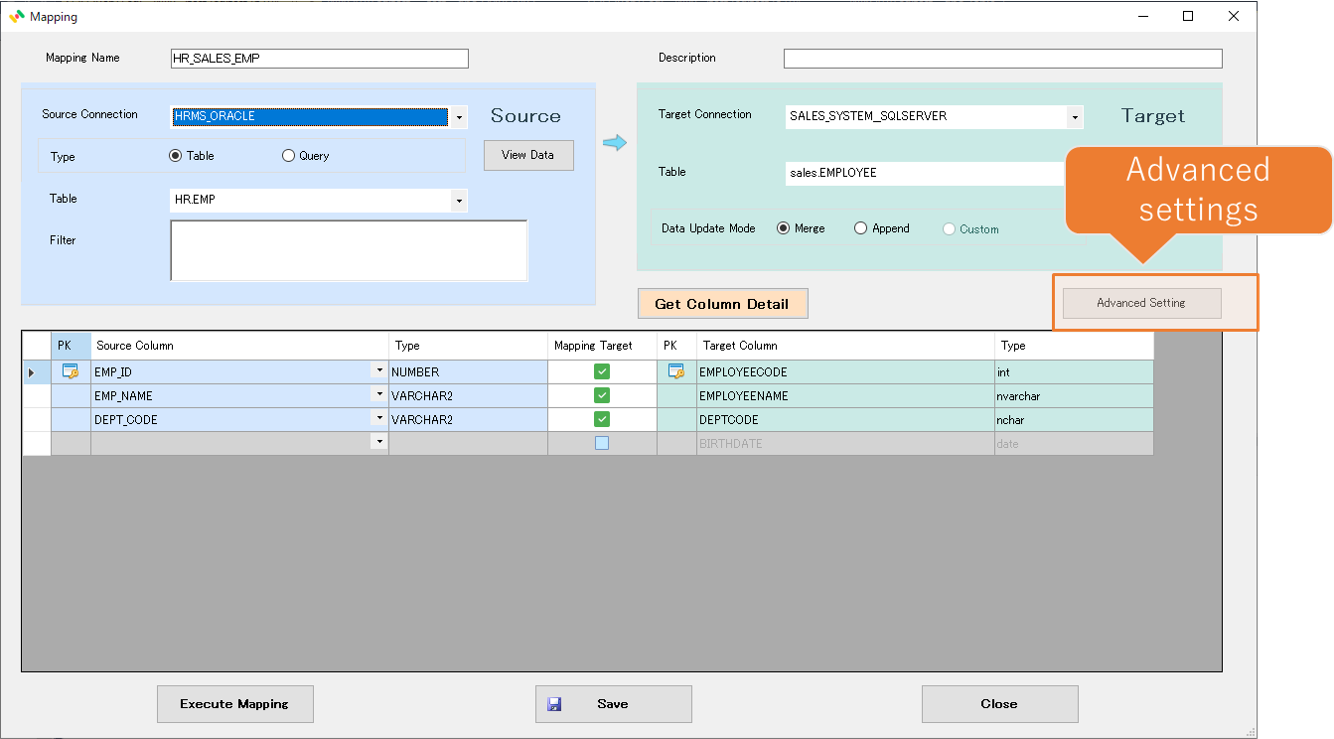
Advanced setting
| No | Item | Description |
|---|---|---|
| 1 | Preprocessor of Extract | You can execute SQL before data extraction.If you want to set it, choose Yes and click the Detail button to set the details. |
| 2 | Postprocessor of Extract | You can execute SQL after data extraction.If you want to set it, choose Yes and click the Detail button to set the details. |
| 3 | Staging table name | Before updating the data, SDI once loads the target data into the Staging table. The staging table name is auto-generated by the system and can be configured. Please enter the table name directly if you want to change it. If you want to use a table with a different schema than the target table, enter it in the following format. schema name.table name e.g : SCOTT.EMPTEMP |
| 4 | Preprocessor of update | You can execute SQL before data update.If you want to set it, choose Yes and click the Detail button to set the details. |
| 5 | Data Update Mode | Select how to update the target table.Merge - Merge the data into the target table using the primary key of the target table as a search condition.If the result is true, then updates the row with the corresponding data from the source table. In case the result is false for any rows, then inserts the corresponding row from the source table into the target table. *If the primary key is not defined on the target table, this method cannot be selected Append - Insert the data into the target table. Custome - Write a SQL statement for updating data. click the Detail button to set the SQL. |
| 6 | Delete Target Table Before Execute | Whether to delete the data in the target table before updating the data. |
| 7 | Postprocessor of update | You can execute SQL after data extraction.If you want to set it, choose Yes and click the Detail button to set the details. |
| 8 | Drop Staging table | Whether to drop the Staging table after mapping processing is complete |
| 9 | Processor on Success | You can define the treatment when the mapping process is successfully done. The treatment includes execute SQL, send an email, and if the source is a file, move, delete, backup, source file. |
| 10 | Processor on Failure | You can define the treatment when the mapping process is failed. The treatment includes execute SQL, send an email, and if the source is a file, move, delete, backup, source file. |
| 11 | Processor on Nodata | You can define the treatment when no extraction data exists. The treatment includes execute SQL, send an email, and if the source is a file, move, delete, backup, source file. |
Pre-processing, post-processing, data update content setting
| Target treatments |
|---|
Setting form
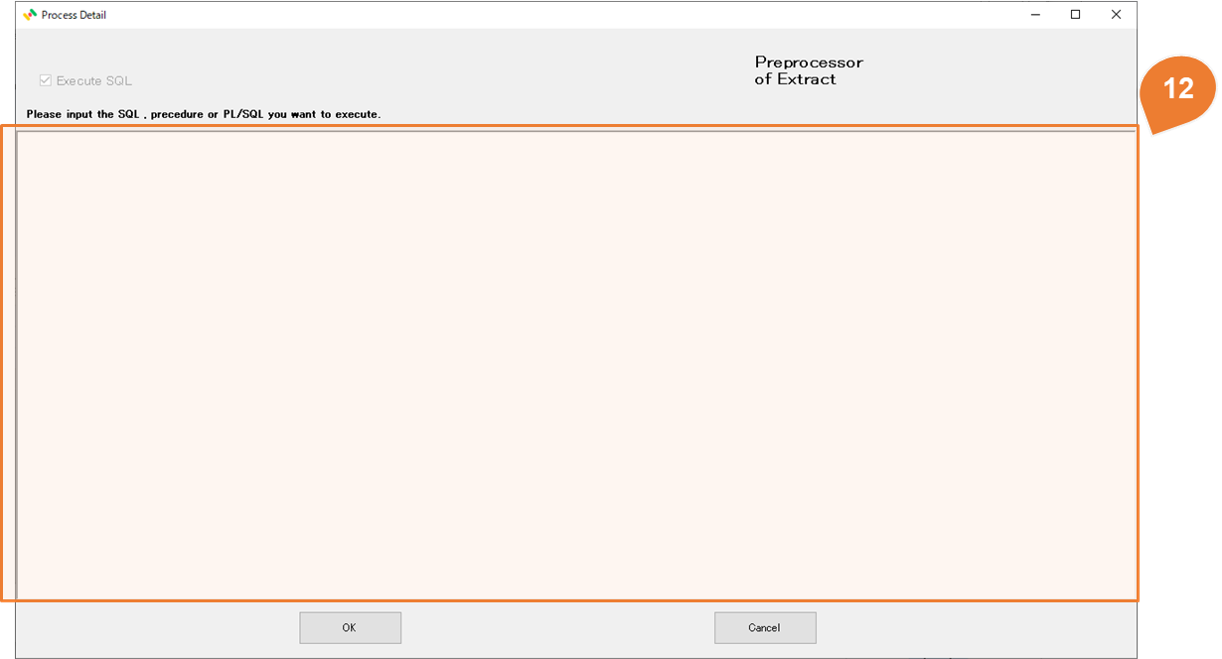
| No | Item | Description |
|---|---|---|
| 12 | SQL | Enter the SQL to execute |
Treatment after mapping process (On Success , On Failure and On Nodata)
| Target treatments |
|---|
SQL execution configuraion
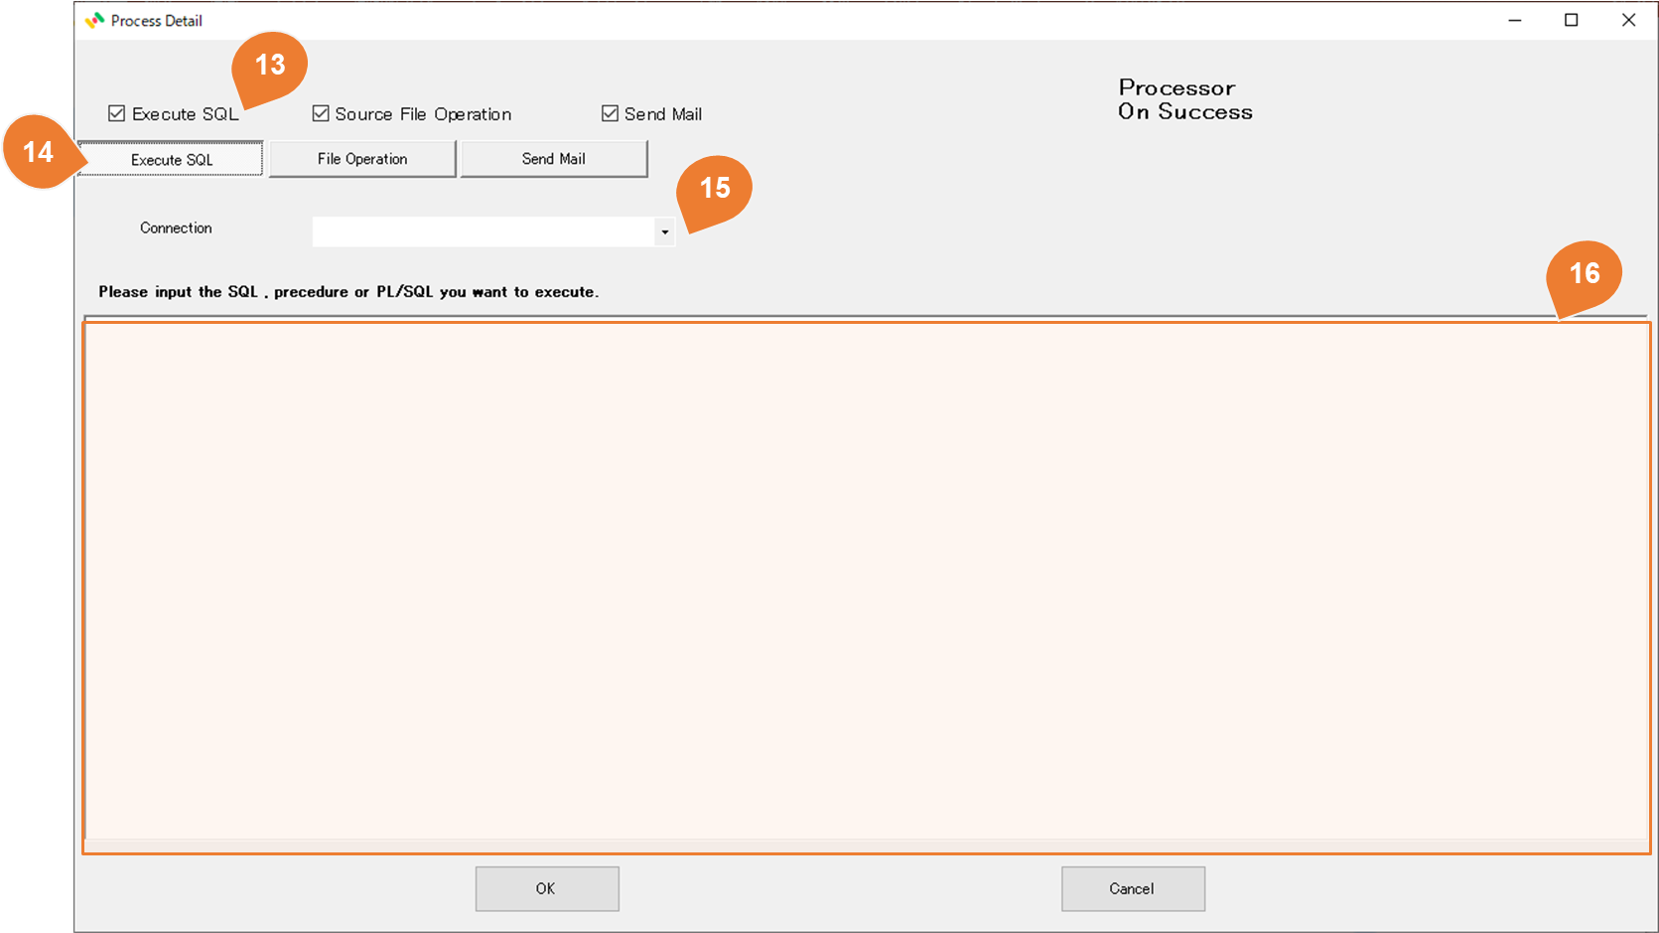
| No | Item | Description |
|---|---|---|
| 13 | Execute SQL checkbox | If you would like to Execute SQL, select the Execute SQL checkbox. If the Execute SQL checkbox is checked, the Execute SQL tab appears. |
| 14 | Execute SQL Tab | |
| 15 | Connection | Select the target database |
| 16 | SQL | Enter the SQL to execute |
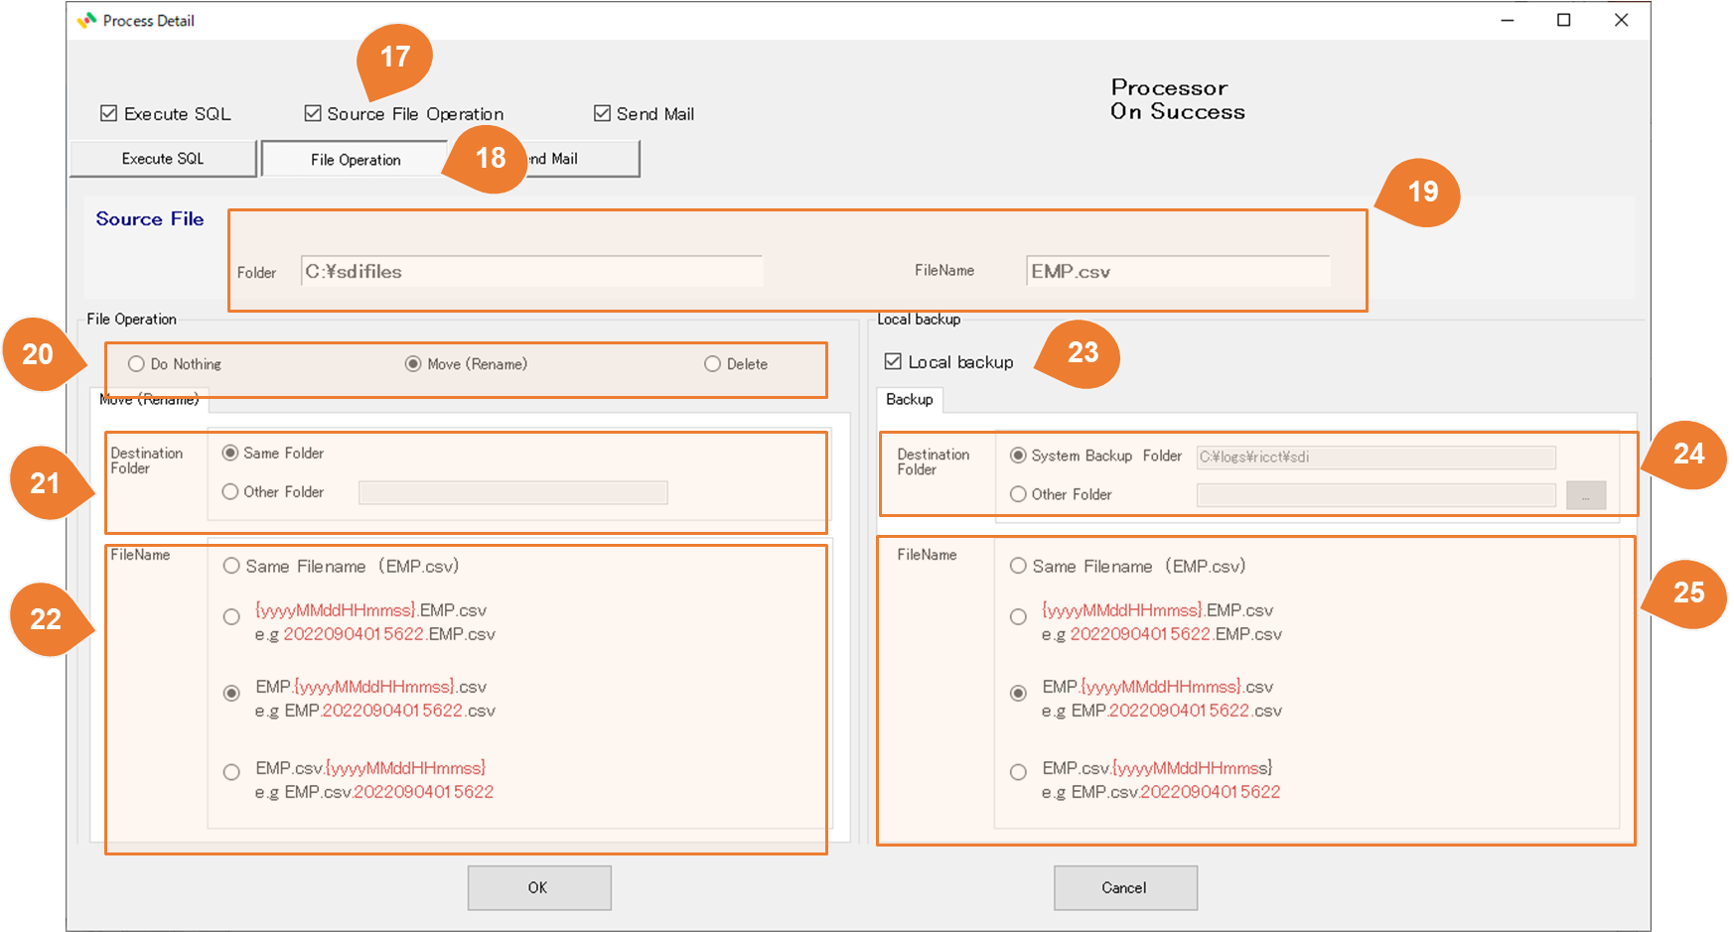
Source File Operation configuraion
If the source is a file like CSV or Execl, you can delete or rename the source file when the import is complete.If you need to set it up, refer to the following manual.
* If the source is RDB, the checkbox will not be visible.
| No | Item | Description |
|---|---|---|
| 17 | Source File Operation checkbox | Check this checkbox if you want to remove or rename the source file when the mapping process is finished. |
| 18 | File Operation Tab | |
| 19 | Source File | Source file information is displayed. |
| 20 | File Operation | Do nothing - Not to operate on the source file.Move (Rename) - The source file will be moved or renamed when the mapping process is finished.Delete - The source file will be deleted when the mapping process is finished. |
| 21 | Destination Folder | Same Folder - Rename the source file in the same folder. Other Folder - Move and rename the source file to a different folder. |
| 22 | FileName | Same Filename - Keep the same filename. {yyyyMMddHHmmss}+File fullname - Put the current time ahead of the file full name. Filename+{yyyyMMddHHmmss}+ file extension - Insert the current time between the filename and the extension.File full name +{yyyyMMddHHmmss} - Add the current time to the back of the file full name. |
| 23 | Local Backup | Check this checkbox if you want to make a backup of the source file when the mapping process is finished. |
| 24 | Destination Folder | System Backup Folder - Use system setting folder. Other Folder - Set any folder. |
| 25 | FileName | Same Filename - Keep the same filename. {yyyyMMddHHmmss}+File fullname - Put the current time ahead of the file full name. Filename+{yyyyMMddHHmmss}+ file extension - Insert the current time between the filename and the extension.File full name +{yyyyMMddHHmmss} - Add the current time to the back of the file full name. |
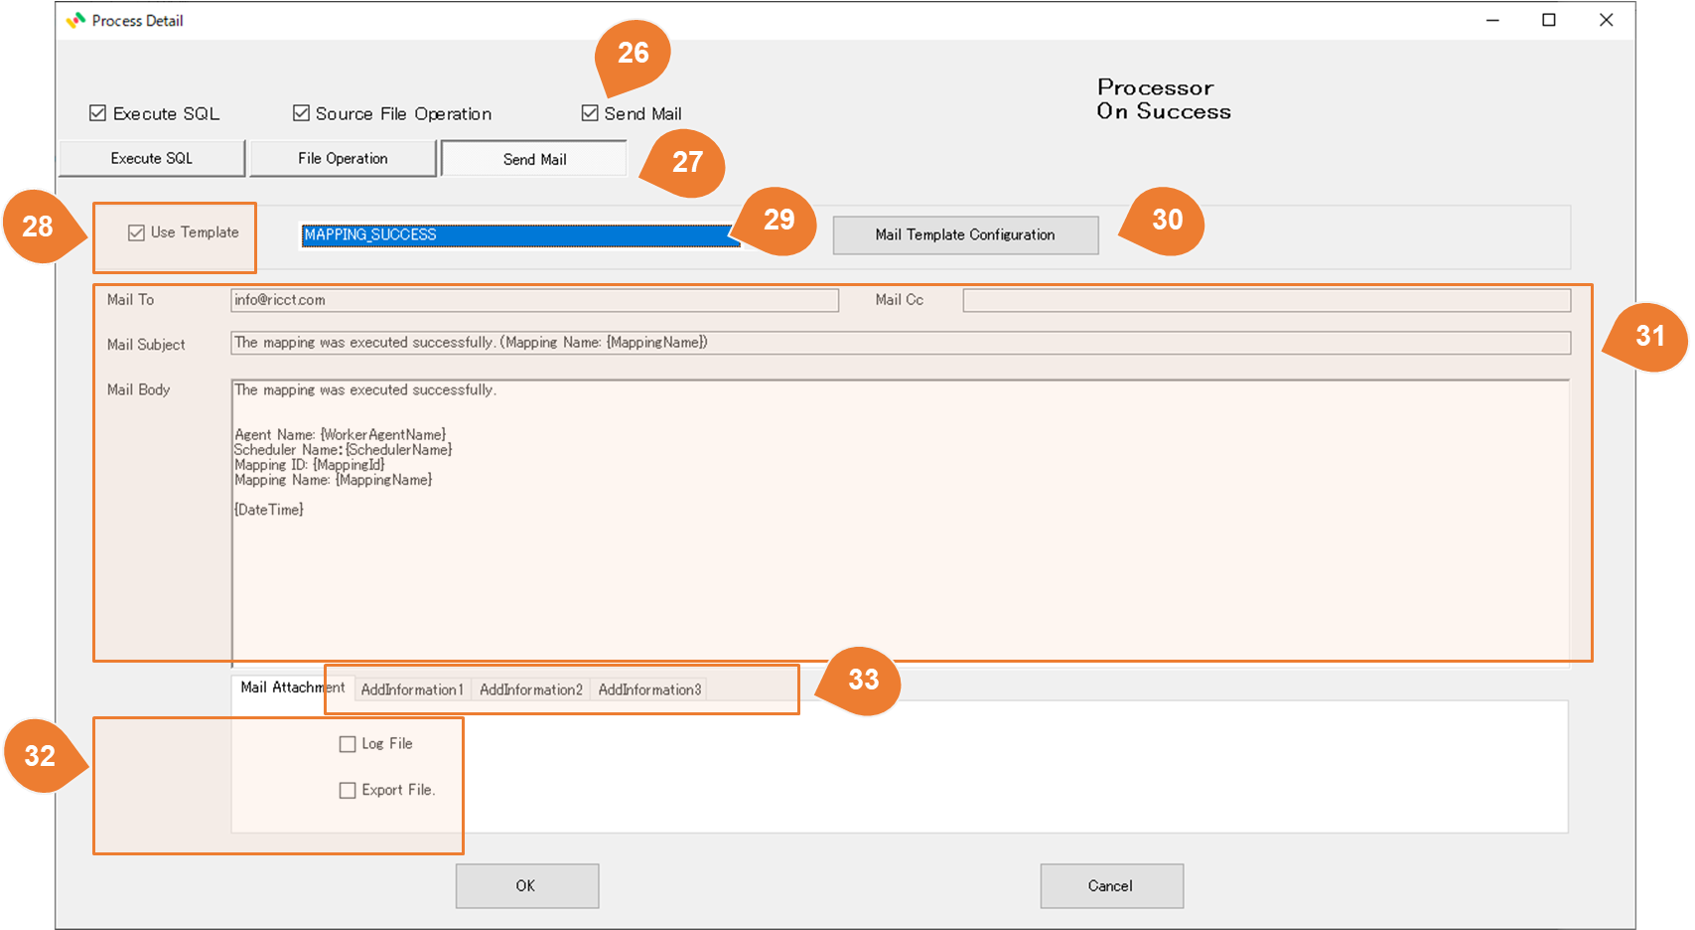
Email notification configuration
| No | Item | Description |
|---|---|---|
| 26 | Send Mail checkbox | Check this checkbox if you would like to send an email notification when the mapping process is complete. |
| 27 | Send Mail tab | |
| 28 | Use Template checkbox | Check this checkbox if you would like to use a predefined mail template. If unchecked, set the email content on this screen. |
| 29 | Template selection | Select the mail template while the Use Template checkbox is checked. |
| 30 | Mail Template configuration | Open Mail Template configuraion form. |
| 31 | Mail information | Set the message to, CC, subject of the e-mail, body of the e-mail, and so on. * When using an email template, it will be Read only. * For details on how to set the email title and body, please refer to the following document. How to write an email template |
| 32 | Mail attachments | It is possible to attach the following files when sending an email. Check the required files.Log File - Detailed LOG file for mapping execution. Export File - -If the target is a CSV or Excel file, you can attach the output file to an email. |
| 33 | AddInformation | You can set up to three additional information in the email title and body. The value {AddInformation1} 、{AddInformation2}、{AddInformation3} in the title and body of the email template will be replaced by the value entered here. |